Replace TackTick Micro Compass Battery
Scroll down to see how to disassemble the compass.
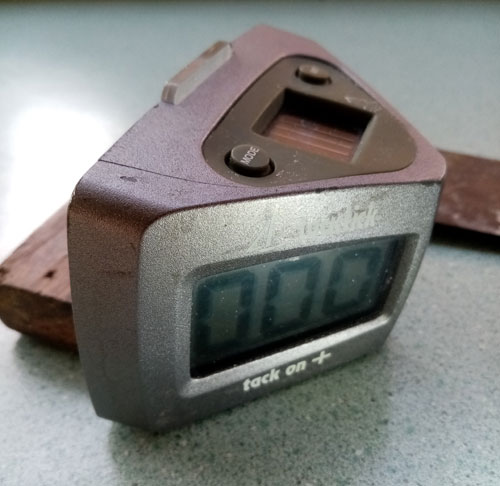
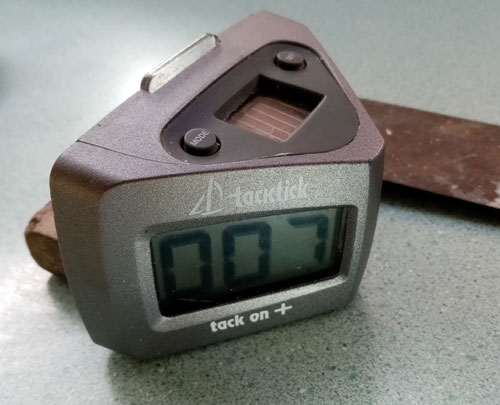
Updated February 2020 -- Problem found in that after a battery is replaced there may be an error in the compass not reading 000 for magnetic north. To calibrate the heading variable in the compass place a known accurate compass (any compass will do; I used a "virgin" original TackTick -- left image) on a square and shift the square till the compass reads 000. Move the compass 90 degrees and check if the reading is 90. Replace the benchmark compass with the newly repowered compass and note the variation. Mine was +7 degrees. Checked on the 90 and the reading was 97. So the compass is reading right, just not calibrated to magnetic north.

From a dinghy, round the cans, sailing perspective it does not
greatly matter if a compass is not calibrated to magnetic north. Only time you really need a compass to point to
magnetic north is when the OOD sets
a compass bearing from the committee boat to the top mark (or a mark laying boat signifying a change in course to the next mark). If you know the variable in your compass
(eg. +7 degrees) you can do a mental correction. So if the compass direction displayed on the committee boat is say 200 degrees to the top mark,
the direction to the top mark on your compass will be 193. Have
a soft lead pencil on a string and write the top mark heading,
relative to your compass, on the deck. Better yet, when you sail your practice beats before the start
you can work out your target tacking headings relative to your compass
(is knowing the direction to the first mark critical?) to note the lifts or knocks as you sail the practice beats.
As long as the compass reads a heading (even
+7 degrees out) your opposite tack will be that plus or minus 80 to 90
degrees (depending upon your yacht's tacking angles achieveable). It will still register the increase or decrease in direction depending upon lifts and knocks.
If anyone has a procedure to recalibrated the true magentic north reading in a TackTick compass, please share and I will publish it here.
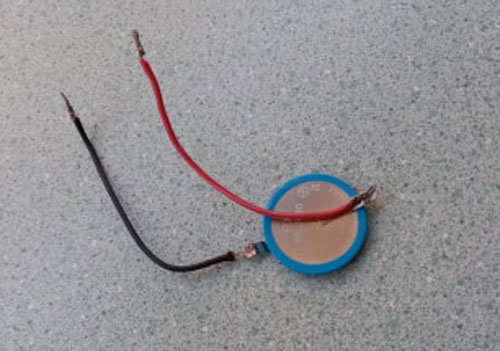
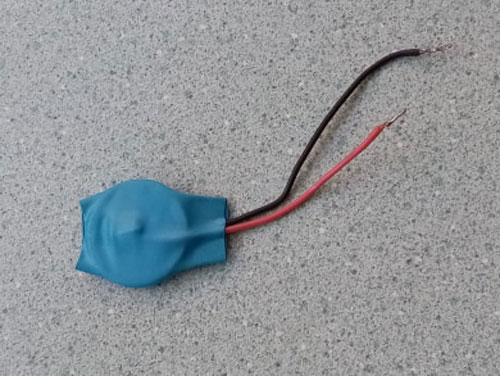
Updated January 2020 -- A simpler way to mount a new battery. Rather then try and source a battery with the tabs in the right place to suit the TackTick compass, simply solder two wires to the each tab, wrap the battery in heat shrink and solder the wires to the correct terminals. Tuck the battery behind the fluxgate and reassemble. Battery can be shop bought in this configuration.
Updated September 2016 -- To make it easier to follow on how to change the battery in the compass, these pages have been simplified and hopefully be an accurate as possible, update.
Many people have generously contributed to this page, too numerous to list you all. These pages are to help our fellow sailors get much greater utility from their TackTick Micro Compass
and as such is presented a guide only.
Have long been a user of the TackTick micro
compass, however the compass had been playing up by not holding a charge long enough for even a
days sailing after being on charge on a sunny window sill for 7 days.
So a quick query to the TackTick service
department on how to "fix" the compass came back this curt
reply.
"With a unit this old there are
very few service options that are cost effective. This unit is now 8
years old. If you return the unit to TackTick it may be possible to
get it replaced with a new unit for £200 which is much less than any
repair would cost. "
£200 pounds is roughly $400 Kiwi
and with the Micro Compass retailing between $600 and $900 Kiwi it
was not a bad deal that TackTick offered.
Judging by numerous forums on the TackTick
compass, we found a general dissatisfaction with the lifespan of the
battery plus the fact that only a straight out replacement of the
compass as the only option was enough to persuade me to take the
compass apart and have a go at a fix.
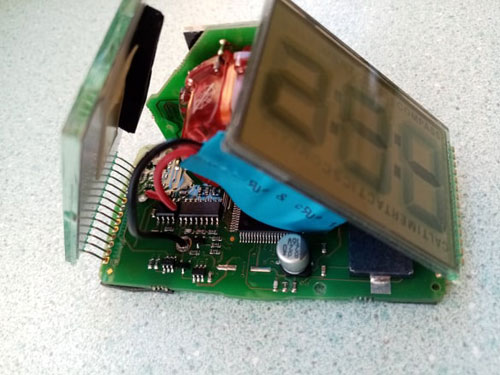
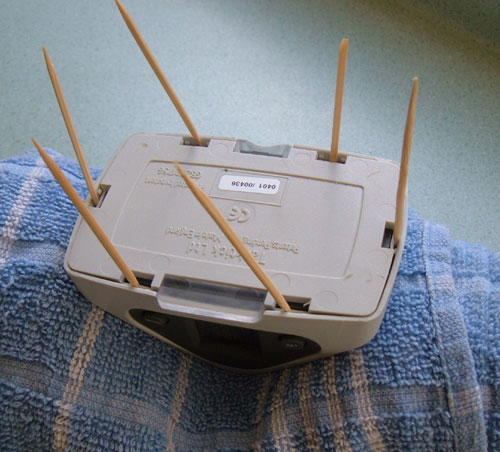
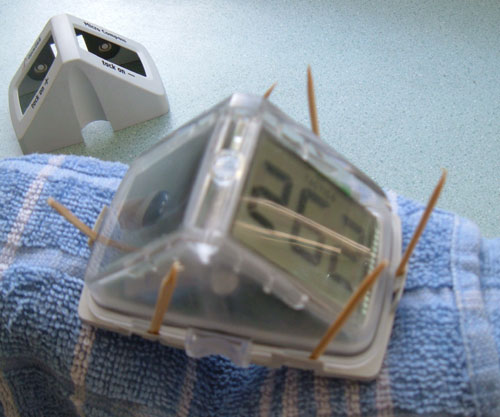
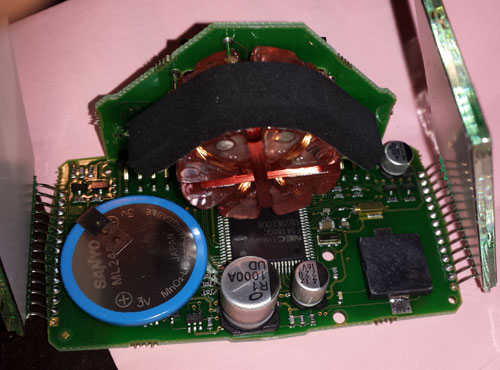
Taking it apart was actually quite easy. Open up
the tabs with a small screwdriver and insert toothpicks or something
similar into the six clips around the outer housing and gently slip
off the housing. Repeat with the inner housing.
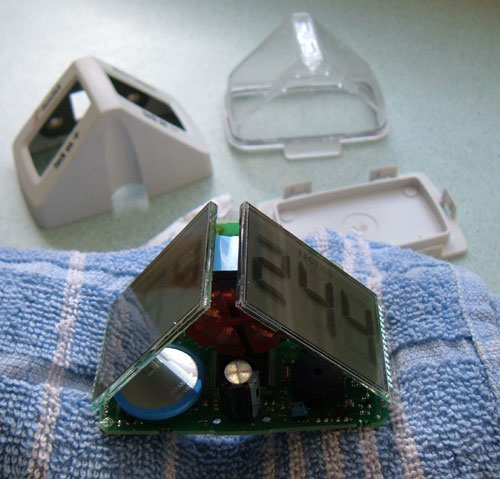

The compass inner workings exposed. Remove the silica gel packet. Note that there are two types of compasses. The earlier ones had an on/off jumper as shown in the above photos, the later ones does not have a separate on/off jumper as per photos below.
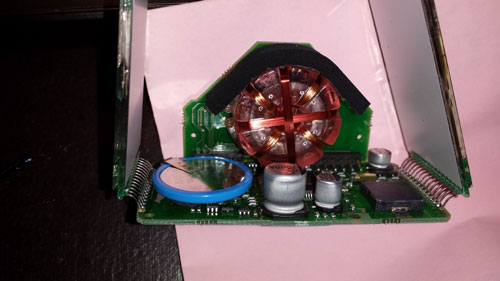 .
. Take a note of the battery polarity and what goes
where. If you have the version with the on/off jumper to the right of the
central capacitor (or whatever it is), remove it to switch the compass off.
If you have the newer version without the jumper,
cover the solar panel with masking or insulation tape and hold MODE until compass turns off.
The new battery you require is the ML2430. a 3 volt lithium magnesium rechargeable button type battery.
Before soldering in the new battery check with a voltage meter that the new battery is fully charged.
Carefully solder in the new battery and check to see if the compass works by either slipping the
jumper back on or removing the tape from the solar panel.
If she don't fire up straight way, cover the solar panel
for a few seconds to see if the compass reboots. If the compass has
been in bright light for a while, it may be required to cover the
solar panel for up to 10 seconds or more to
reboot.
No point in reassembling
the compass unless you have it working. Use a smear of silicone
grease
(not silicone sealant!!) on the inner cover seal to waterproof the
unit when reassembling. Silicone grease can be bought in most good
dive shops.
After battery replacement, there might be CAL on your left
display and compass degrees on right display. It’s means that you
need to calibrate your buttons.
Buttons calibration:
1.
Turn OFF your Micro compass (cover solar cell and hold MODE
until compass turns off).
2. Turn ON your Micro compass.
Display show bAt – 200 (could be any number as it indicates the
charge in the battery - max is 200).
3. When you see bAt –
200, press and hold MODE and SET until you have 013 – 16P
on display.
4. Press quickly (but not hold) MODE and
SET until you have tst – A1
5. When you see tst –A1, Press and
hold MODE and SET until you have tst – P on your displays
6. Turn
off your Micro Compass
If the final display was tst - F then
repeat the procedure (You might need to do this calibration several
times).
If the unit fails repeatedly then there is a hardware
or software fault inside the unit.
So while you will have voided the TackTick
warranty, it actually does not matter, the compass was dead
anyway.
TackTick should make it easier to replace a simple
$20 battery in their compasses. My wrist watch gets a regular
battery upgrade without needing a full replacement watch on every
occasion. It would not be too hard for Tacktick to provide a
waterproof battery compartment not just in the micro-compass but in
all their equipment.
For TackTick to say that a battery
change is not cost effective is pure bollix.
